Add, edit, copy, or remove items (the list screen)
Audience: operators · Scope: the shared list screen used across the admin area · Last reviewed: 2026-07-12
What this does — Most menu entries open a list screen: a table of all the items of one kind (all news posts, all finishes, all products…). The list screen works the same everywhere, so learning it once covers the whole admin area. This article shows how to find, add, edit, copy, and remove items.
Before you start
- You need to be signed in — see Log in to the admin area.
- Open any list from the menu (for example News) to follow along.
The parts of a list screen
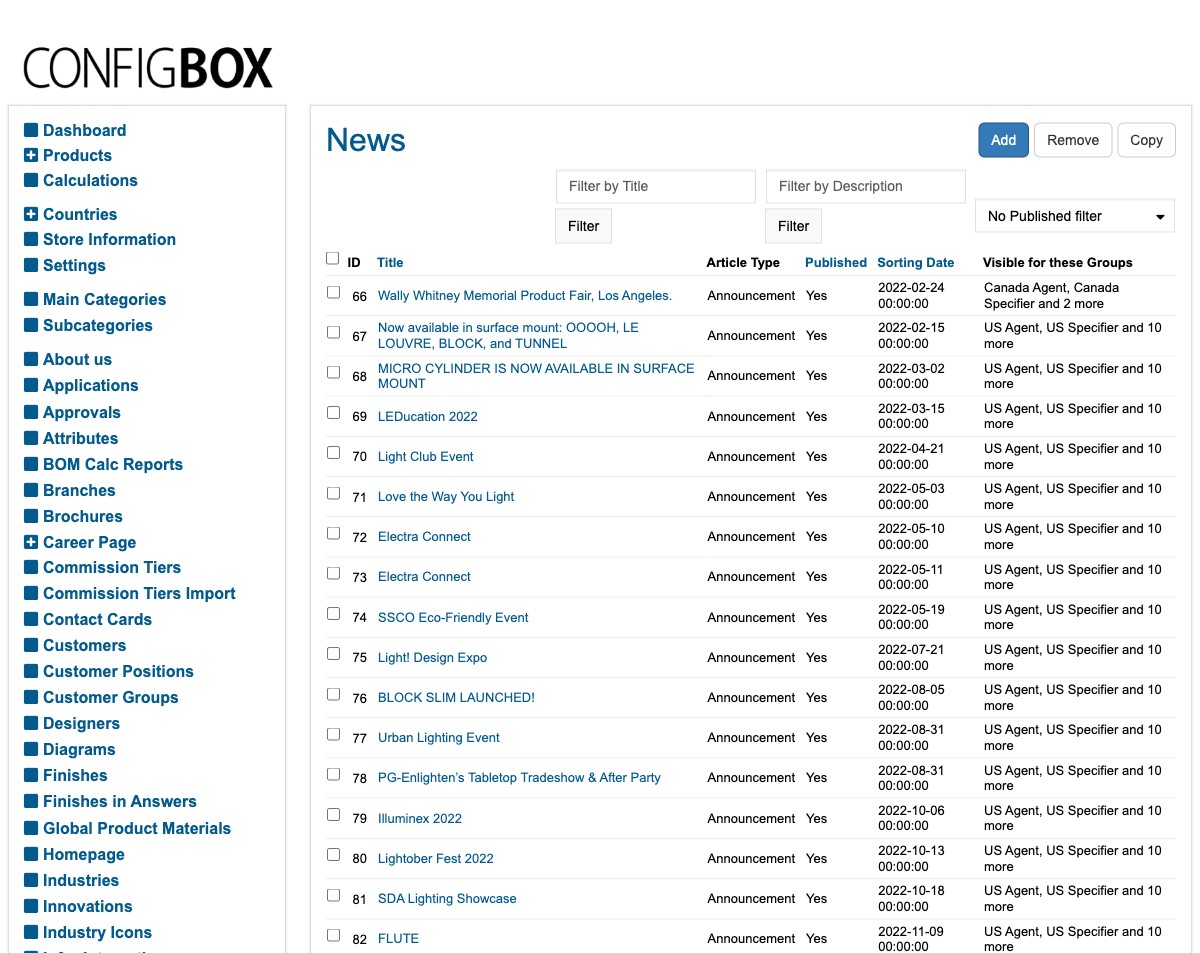
- A title at the top (the kind of item you're looking at) with three buttons on the right: Add, Remove, and Copy.
- A row of filters to narrow a long list — see Search and filter a list.
- A table of items. Each row has a tick box on the left, an ID number, and columns of details. Common columns you'll see across screens: Title, Published (Yes/No), a Sorting value, and Visible for these Groups (who can see the item).
- On manually ordered lists, a drag handle (≡) on the left of each row lets you drag items into the order they appear on the site.
Steps
Find an item
- Filter a long list down to what you want — this has its own short article: Search and filter a list.
- Sort by clicking a column heading (where available).
- Re-order a manually-ordered list by dragging the handle (≡) on the left of a row.
Add a new item
- Click Add (top-right).
- Fill in the details on the edit screen that opens — see Fill in an item's details.
- Click Save (or Save and Close to save and return to the list).
Edit an existing item
- Click the item's title (or open it however the row allows) to open its edit screen.
- Make your changes and Save.
Copy an item
- Tick the box next to the item you want to duplicate.
- Click Copy. A copy is created that you can then open and edit — handy when a new item is nearly the same as an existing one.
Remove an item
- Tick the box next to the item(s) you want to delete.
- Click Remove.
What happens next
- Adding or editing takes effect once you Save. If the item is Published, your change is live on the website; if not, it stays hidden until you publish it (see Fill in an item's details).
- Removing deletes the item. Treat it as permanent.
Good to know
- Publishing vs. removing. To take something off the site temporarily, don't remove it — open it and set Published to No. You can switch it back on later. Remove only when you're sure it's gone for good.
- Copy saves time. For repetitive items (finishes, tiers, similar products), copy an existing one and edit the differences rather than starting from scratch.
- The ID number is just the system's internal reference for the row. You rarely need it, but it's useful when asking your Beta-Calco contact about a specific item.
- Filters only change what you see, never the data — clear them to see the full list again. See Search and filter a list.
Troubleshooting
- Your new item isn't on the website. Check it's Published: Yes, and that the right groups are ticked under Visible for these Groups — an item visible to no one, or only to the wrong group, won't appear for the visitor you expect.
- You can't find an item you know exists. A Published filter may be hiding it — set the dropdown back to show everything, and clear any text filters.
Screens and labels can differ slightly between environments — if a label doesn't match what you see, check with your Beta-Calco contact.